
Elise, from Minnesota, shares with the community details of this fabulous large natural playground area she created in her garden for the 2 kids…
What did you do?
Natural Playground…
PLANNING The first thing we did was call landscaping companies and price out how much materials would cost. After we decided this was an activity that fit in our budget we got to work preparing the yard.
PREP: The first thing we did was removed and transplanted the bushes along the fenceline. We took down the old rusty clothesline poles using an electric saw. They were filled with cement and SUPER heavy!
Next, I raked up all the weeds so I could get an idea of how even the area was.
We also measured out the area using sticks and string.
I started taking out dirt from the sandbox and pea gravel area.
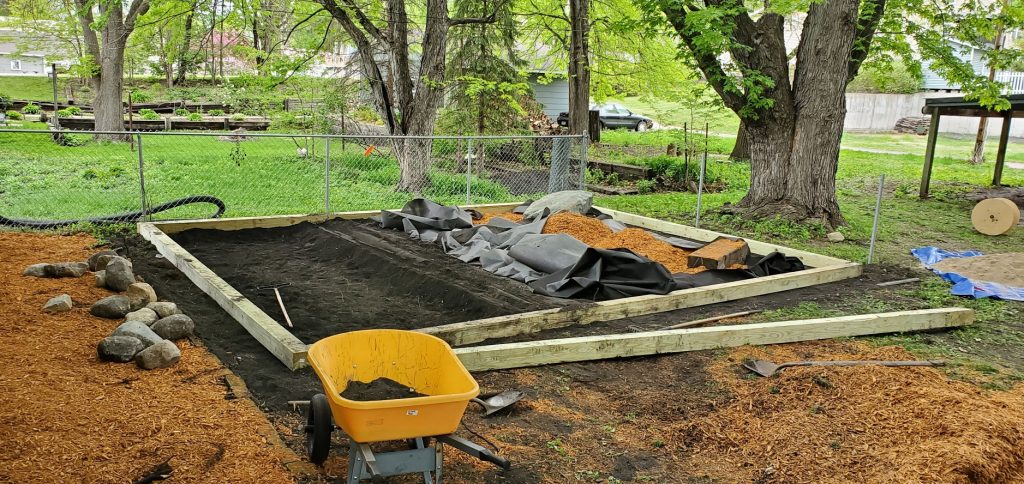
Once the area was leveled and dugout, we laid down the landscaping fabric.
I also called up a few of my farmer friends and asked if they had any field rock I could have. I found one farmer with tons and tons of perfectly sized field rock for the divider between the sand and pea gravel. I drove out there and loaded the jeep up twice.
ORDERING We ordered 6” x 6” timbers from Menards’ website and had them scheduled for delivery. For the size of the natural playground in these pictures, we ordered three 18’ timbers and two 22’ timbers.
Once the timbers were ordered we knew exactly what dimensions the playground would be so I felt comfortable going to our local landscaping company. I ordered the sand, mulch, pea gravel and a boulder. Picking out the boulder was a very exciting moment!
DELIVERY We had everything delivered on Friday and Saturday and got straight to work. Menards brought the timbers in on a flatbed trailer. We had to get them off the truck and out of the way for the rest of the deliveries to be brought in. They were really heavy!
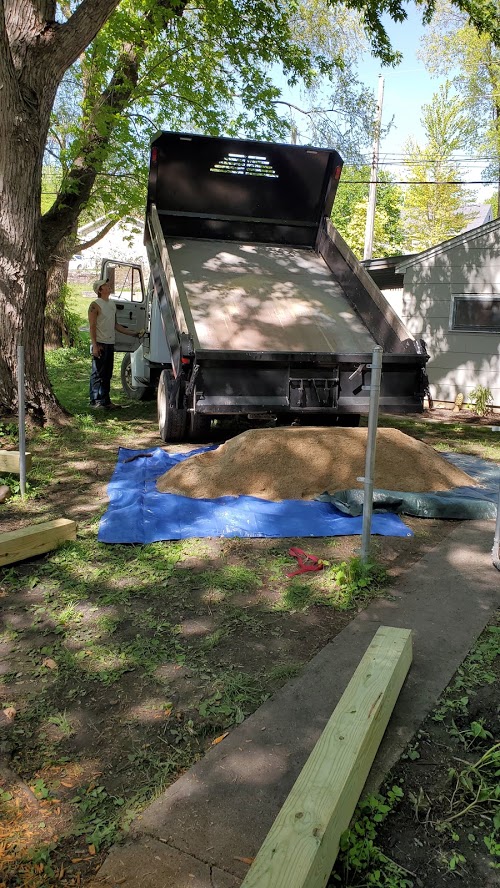
The landscape company we went with, Earthworks in New Ulm was incredible to work with. They delivered everything as close to the worksite as they could using big dump trucks. They also delivered and placed the boulder I had selected in exactly the position I wanted using a bobcat.
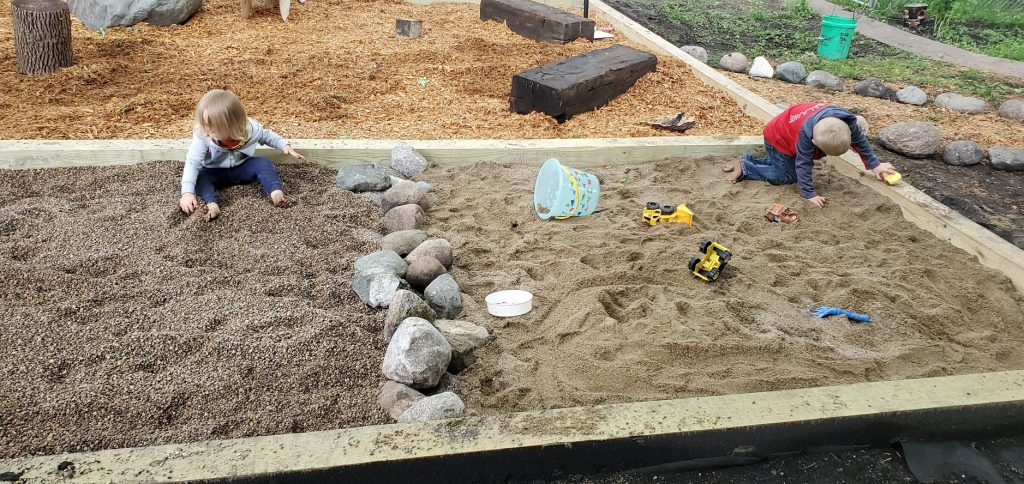
SETUP/BUILDING Once we had all the materials on site it was time to start assembling! I leveled the places where the timbers would go and we joined them together using brackets and nails. Once the timbers were even and secured we started loading up the wheelbarrow with mulch, pea rock and sand. (pictures of timbers being placed)
SUMMARY The whole project took two weeks from idea to reality. We couldn’t be happier with it! Having a natural play area right outside our door makes our lives so much more fun, creative and easier! We love being able to let the kids play as long as they desire without putting many rules on their play.
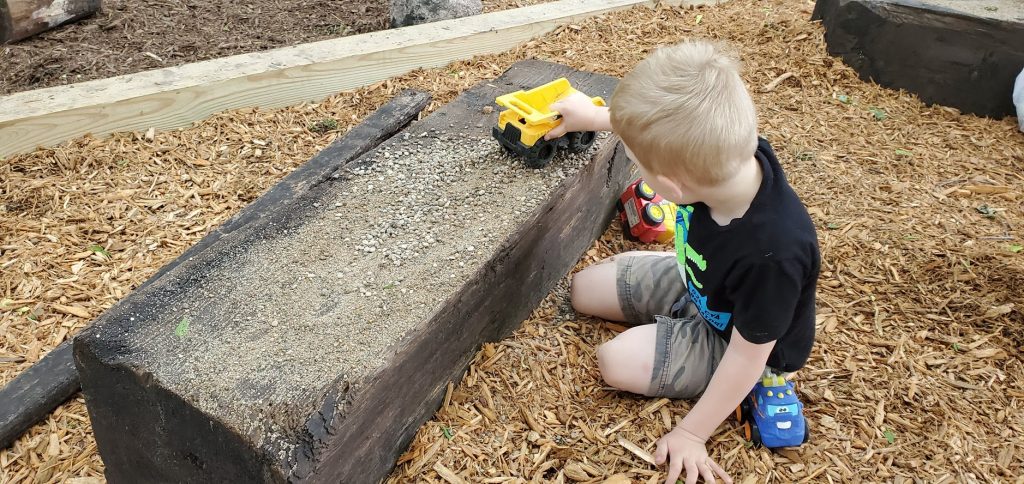
The most difficult thing for me is letting the materials get mixed together. The very first day the kids were dumping sand into the mulch area. I had already decided that I didn’t want the kids to feel like they were in trouble for experimenting or playing so I wasn’t going to make a rule that they had to keep the materials separate. The space was built specifically for them to learn and explore!
What’s your next project idea?
Our next project is to install a rain barrel to collect rainwater for the kids’ play. The little ones love running water and we do have a hose hooked up to city water right next to the playground, but rainwater is free! I also plan on making a mud kitchen to go in the pea gravel area for the kids to bake lots of delicious muddy treats.
Tell us a bit about yourself…
My name is Elise, I have two children. A boy age four and a girl age two. I am from Minnesota, United States. I’m a high school special education teacher.
How are you finding being housebound with kids so far?
Being housebound has been enjoyable for me. I’m an introvert so I don’t mind staying home 🙂
Any tips to help people when they are housebound with kids?
Getting the kids outside has helped our mental and physical health. Going for bike rides and walks has been a part of our everyday routine.