Shahzia, from Oslo, Norway, sent in this great cardboard keyboard idea. Let’s take a look at it…
What did you do?
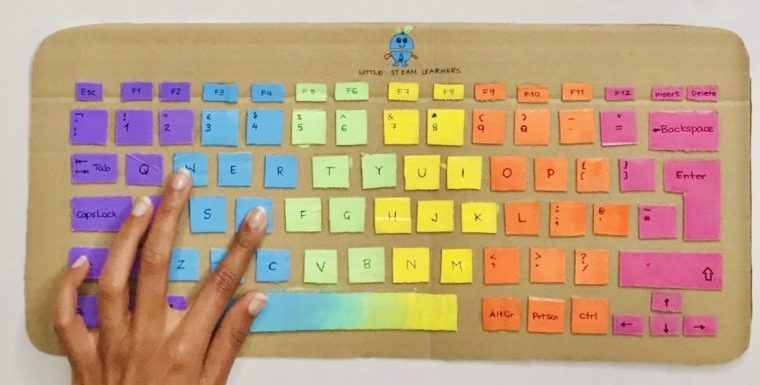
The unplugged cardboard keyboard is a fun recycled craft that involves learning about technology without using screens. This activity may seem very simple but has room for a lot of learning.
Supplies used:
– Cardboard
– Paintbrushes
– Acrylic paints
– Black marker
– Scissors
– Glue
How to:
Putting the keyboard together is pretty simple and can be completed in just a few steps.
1. Pick the size of the base of the keyboard. In our example, we cut a 40 x 20 cm base. I suggest you pick a larger one for younger kids but you can make it smaller for older kids.
2. Decide what keyboard you would like to copy. Different keyboards have slightly different layouts depending on the brand, language or type of keyboard.
3. Cut out the different shapes and sizes of the keys and lay them out on the base.
4. Glue each key into place.
5. To personalize the keyboard, paint the different keys, use your imagination and get creative. For younger children, I suggest doing this step before sticking the pieces onto the keyboard base in order to prevent the paint from getting onto the base (unless you want it to have that look 😀 ).
6. After the paint has dried, use a permanent marker and write the keys in, and VOILA! Your crafty unplugged keyboard is complete.
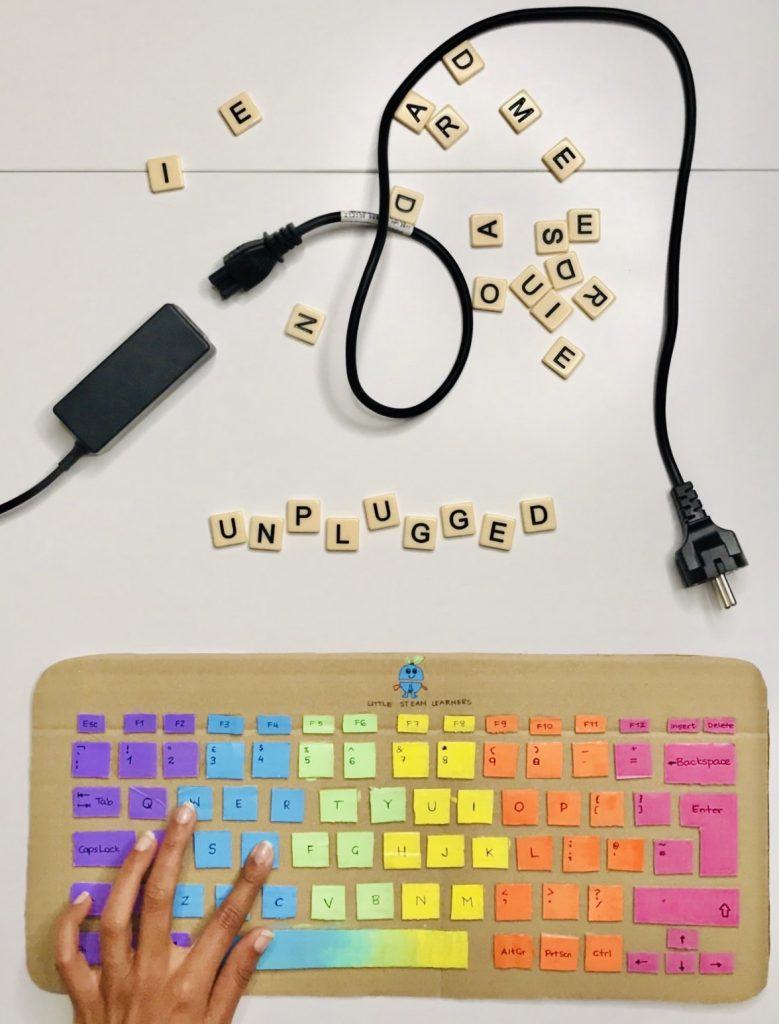
Though the keyboard making process is very simple, it took us 3 days to complete the craft because we added other elements to the crafting process. Here is a breakdown of the different things we did as we built this cardboard keyboard.
We started off with a search around the house of all things that have a keyboard from iPhones to real keyboards. We compared all the keyboards and found a lot of differences which was really cool!
We then talked about shapes, counting, order and started cutting pieces for our keyboard.
As we were doing that I got a tonne of questions about the different keys and their function. This was a great opportunity to talk about the function of a keyboard, how it works and of course what each key can do.
We got side tracked and started trying out the different keys on MsWord. This was a lot of fun and kept them busy exploring for quite some time. So much learning here and it was all child-led!
Finally we added some art by painting our keyboard.
The finished piece can be used for multiple things. For example, we are now using our finished keyboard and scrabble pieces to form words and sentences and sometimes we use it as a prop in pretend play.
The bonus with this activity is, it includes items you have at home, it is all recycled, can be child-led and leads to different venues depending on what the little one is curious about.
Tell the Housebound With Kids community a bit about yourself…
My name is Shahzia. I am a Science educator and founder of Little Steam Learners, where I share my love for STEAM based hands-on activities. My background is in Biochemistry and Early years education. I am based in Oslo, Norway.
@little_steam_learners
Do you have any tips for other parents?
I think the most important thing to think about when you are housebound with kids is to have fun and take it easy. This situation is just as odd for children as it is for adults, and children are fantastic and fast learners, they will bounce back pretty fast. So do not worry too much on what educational goals your child needs to cover and set too much pressure on that. Instead, spend the quality time with your children and taking it easy, as that is what they will remember when all of this is over.
What are your family’s favourite board game(s)/card game(s)?
What toys would you recommend to other parents?
Absolutely love loose parts toys such as Grimms wooden blocks and Sumblox.
Has this website and community helped you?
Housebound with Kids website is a great resource and a wonderful initiative during these difficult times.